Informatica PowerCenter is a popular ETL tool I have used on two projects in the past and I decided to download the Express edition to keep from getting rusty.
I have SQL Server 2012 Enterprise running on my machine and wanted to use it as a staging database, the only issue was connecting Informatica Developer to SQL Server (it’s been awhile). After searching the internet and watching videos to no avail I finally stumbled upon a method which worked for me, so I figured I would share it and hopefully save someone precious time.
Begin by launching Informatica Developer.
Click the Create Connection button in the top toolbar.
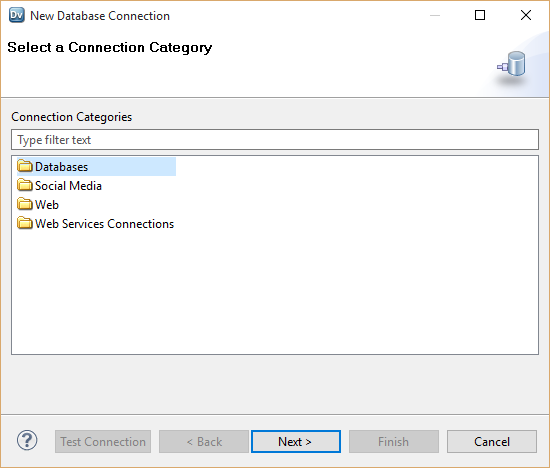
Select Databases and click the Next button.
Next enter a Name, ID, and Description for the new connection. Select Microsoft SQL Server from the Type drop down menu and click the Next button.
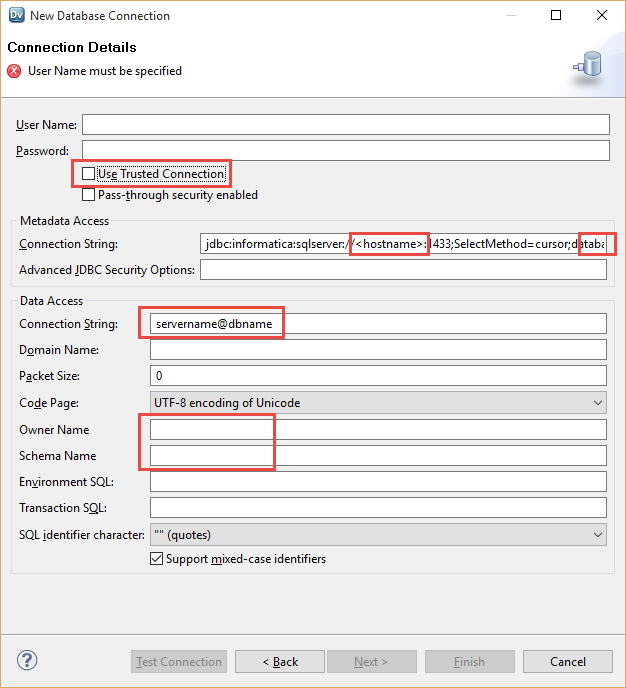
This next step is where I struggled. Because I setup the local instance of SQL Server with Windows Authentication I didn’t need to enter a User Name and Password. Instead I checked the Use Trusted Connection checkbox. So, in the New Database Connection Details perform the following:
- Check the Use Trusted Connection setting (if the user has Windows Authentication for the server)
- In the Metadata Access section in the Connection String field:
- replace the <hostname> string with ‘localhost‘ (with no quotes)
- scroll to the right and replace <dbname> with the database name
- In the Data Access section in the Connection String field enter the server name @ database name (Mine was DONNY-PC, which is the name of the SQL Server and my Windows machine)
- In the Owner Name and Scheme Name fields enter ‘dbo‘ (which is the default schema for SQL Server)
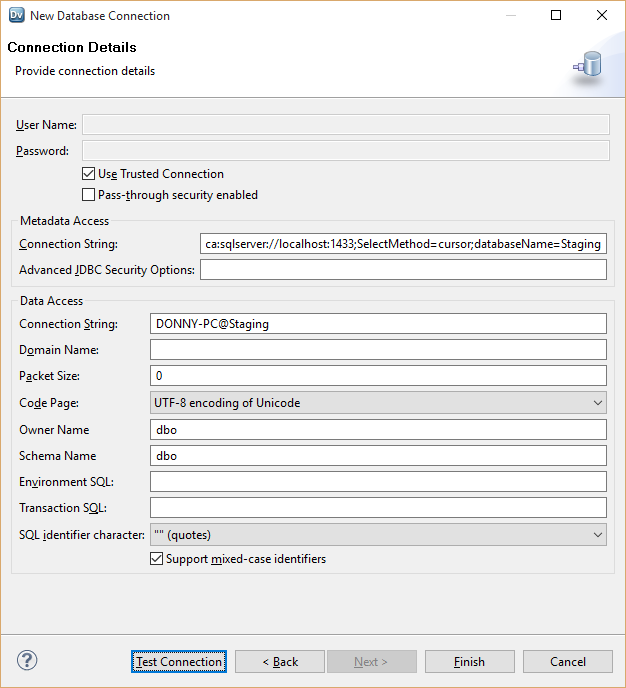
A screenshot after all the necessary information has been entered. Note that localhost:1433 refers to port 1433, the default port for SQL Server. If you have multiple instances then this port will be different if you aren’t using the default instance.
After you entered all the necessary information click the Test Connection button and you should see a window pop up like the one below.
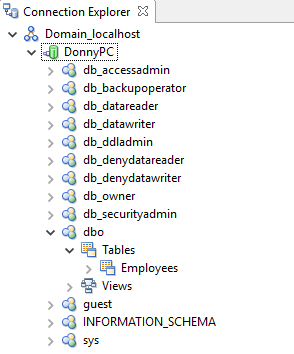
Click the Finish button and the new connection will be available in the Connection Explorer window.
I created an Employees table to ensure everything was setup correctly but will eventually import the AdventureWorks database so I have some data to play with. Hopefully this makes your setup simpler than mine was.


